MiniMax H3 Image
Explore MiniMax H3 Image for native 4K detail and images shaped by your creative intent. Start with a written idea or reference images to develop scenes, products, and characters.
What is MiniMax H3 Image?
MiniMax H3 Image is an open-weight generation and editing model built on MiniMax H3. One checkpoint handles text prompts and edits with 1–16 reference images. From realistic photography to illustrated worlds, MiniMax H3 Image combines detailed output with an understanding of composition, objects, and spatial relationships.
Key Features of MiniMax H3 Image
Six ways to turn a creative brief into a concrete visual direction.
Native detail, without an upscaler
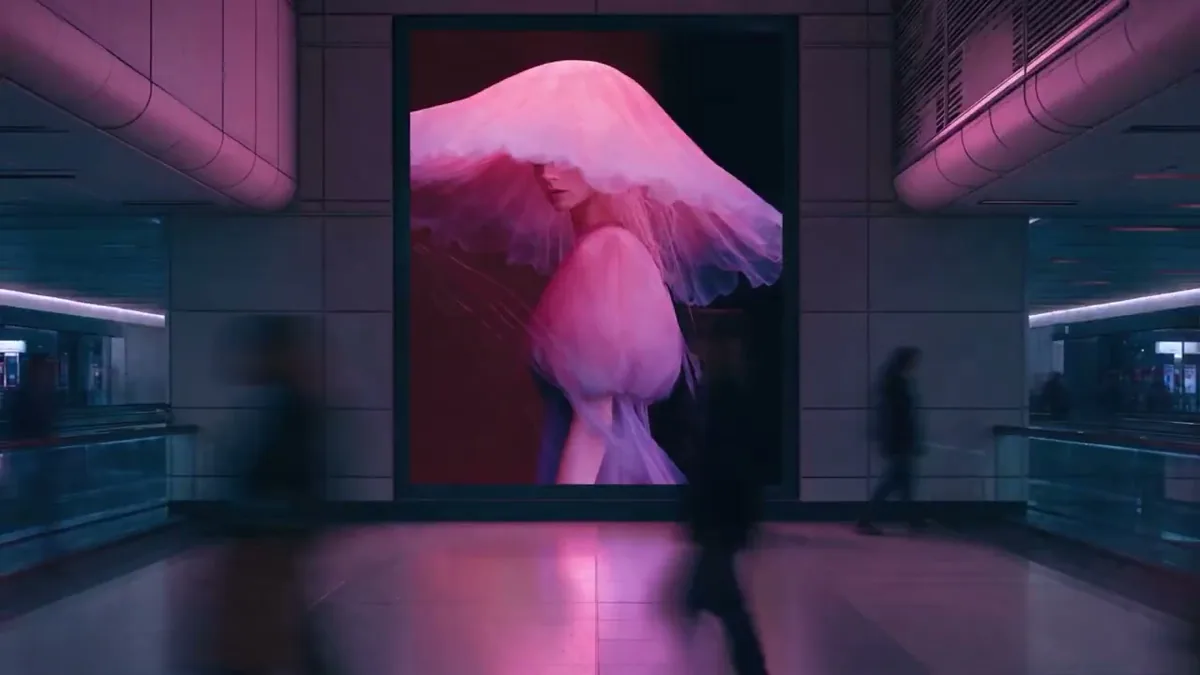
MiniMax H3 Image generates native 4K images with rich surface detail. Describe texture, lighting, and depth to create photographic scenes, from soft fabric and weathered wood to reflections and distant landscapes.
Explore a detailed scene
Bring many references into one scene
Combine up to 16 reference images with MiniMax H3 Image. Assign each image a role and specify placement, scale, and lighting. The example brings an empty room and nine furniture references together into a furnished living room.
Compose with references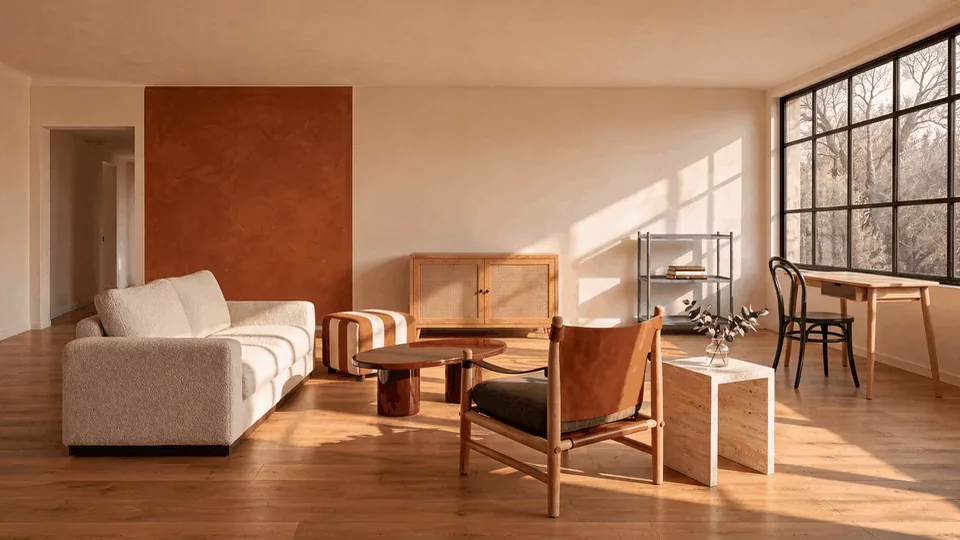
Keep complex briefs connected
MiniMax H3 Image follows relationships between objects, labels, and layout instructions. Plan a poster, evidence board, or illustrated logic problem with a clear hierarchy. Keep important text short and review spelling before delivery.
Build a visual brief
Step inside a game map
Supply a map and identify the viewpoint with an arrow. Describe the camera height and environment to develop a first-person 3D scene with a matching minimap. This turns a top-down plan into a view a player might experience.
Imagine a playable world

Turn a bare render into a film scene
Use MiniMax H3 Image to develop materials and atmosphere from an untextured 3D render. The lunar research base example pairs a structural reference with cinematic lighting and surface detail, helping communicate a scene before final production.
Develop cinematic lighting

Explore a distinctive visual language
Move between painterly illustration, game artwork, and imaginative concepts. Specify palette, medium, and mood while retaining a clear subject. Compare directions for a world or campaign before expanding the chosen style.
Shape an art direction
How to use MiniMax H3 Image
Prepare your idea, set up the generator, and review the result.
Add your references
Start in Image to Image and upload your reference images. Choose Text to Image when your starting point is a written idea.
Describe the intended result
Select MiniMax H3 Image, describe your idea or edits, and choose an aspect ratio and resolution. Switch to custom dimensions when you need an exact size, then review the credit cost before generating.
Generate and review
Submit when ready, inspect the result, and download your preferred image. Check small details and text before using it in a finished project.
MiniMax H3 Image parameters and credits
Choose your output size, understand each setting, and check the cost before creating.
Credits per image
| Resolution | credits / image |
|---|---|
| 1K | 1 |
| 2K | 1 |
| 4K | 3 |
The same rates apply to Text to Image and Image to Image. Reference images do not add to the credit cost on Seevio AI.
| Parameter | Options and meaning |
|---|---|
| Creation mode | Text to Image · Image to Image Start from a prompt, or edit and combine reference images. Both modes support the size, prompt expansion, and output settings below. |
Promptprompt | 1–5000 characters · Required Describe the subject, composition, lighting, and style. For edits, identify each reference by its order and explain what should change or stay the same. |
Aspect ratioaspect_ratio | auto, 1:1, 16:9, 9:16, 4:3, 3:4, 3:2, 2:3, 21:9, 4:5, 5:4 Default: auto. With Text to Image, auto chooses a shape from your prompt when prompt expansion is on; with expansion off, it uses 1:1. With Image to Image, auto follows the first reference. Used only with preset sizes. |
Resolutionresolution | 1K · 2K · 4K — Default: 2K Sets the output size tier when using preset sizes. The exact dimensions depend on the aspect ratio. At 1:1, the sizes are 1024 × 1024, 2048 × 2048, and 4096 × 4096 pixels. |
Custom dimensionswidth / height | Both required in custom mode · Each 1–8192 px Enter whole numbers for both dimensions. Total pixels must be 655,360–20,000,000, with width:height between 1:3 and 3:1. Custom dimensions replace aspect ratio and resolution; they cannot be combined. Without custom dimensions, preset sizes apply. |
Prompt expansionexpand_prompt | true (on) · false (off) — Default: on On: the model expands your prompt to add detail. Off: it uses your original prompt without expansion. Available in both creation modes; it also affects automatic aspect ratio selection in Text to Image. |
Reference imagesimage_urls | 1–16 images · Required for Image to Image only Use references for subjects, style, or composition. Upload JPG, PNG, WebP, or BMP; HEIC is supported via public image URLs. Each image must be at most 20 MB and 64 MP. No separate combined-size limit is specified. Text to Image does not use references. |
Output formatoutput_format | PNG · JPEG — Default: PNG Choose the file format for your generated image. Both creation modes support these formats. Each generation task produces one image. |
The form starts with aspect ratio and resolution. Switch to custom dimensions for an exact width and height; the displayed credit cost updates with your settings.
Prompting tips
How to get more from MiniMax H3 Image
Describe the basics
Start with the task, then add the style
Explain the goal, how the image will be used, the main people or objects, and their state or actions. Then add your style requirements.
Set the overall layout before local details
Specify the number and positions of subjects, the viewing angle, and empty space. For complex images, describe the main sections first, then their contents and relationships. For example: “Title at the top; below it, an image on the left and text on the right.”
Express style through visible details
Describe colors, materials, light, and texture. Use “soft side lighting, metallic reflections, and clean negative space” instead of a vague request for a “premium feel.” Prioritize key details and avoid contradictory requirements.
Text and information
Provide the exact text in full
Put the complete wording you want to display in quotation marks, and specify its position, hierarchy, and line breaks.
Say explicitly when you want the model to write copy
Specify where text should appear and what it should say, or ask the model to compose suitable wording for that part of the image.
Say explicitly when no text is needed
Include “Do not add any text, letters, or numbers to the image” to reduce unwanted titles, labels, or decorative lettering.
Supply accurate facts and data, and define relationships
For charts, research figures, and educational content, provide accurate information, values, units, and the relationships between them. Include the time range when showing changes over time. Label sample data clearly so it is not confused with real data.
Multiple references and editing
Assign a role to each reference
Explain what each image contributes, what must remain consistent, and what may change. For example: “Keep the product from image 1, use the colors from image 2, and follow the layout of image 3.” If borrowing only colors, state that the shape and material should not be copied.
Separate what changes from what stays
Identify the object by its position or features. State the desired change, its scope, and what must be preserved. For example: “Make the cup on the left blue; keep its shape, material, position, and size unchanged.”
Describe the complete edited result
Distinguish moving, copying, replacing, and deleting. When deleting an object, explain how to fill its original position. When changing text or data, provide the full replacement and specify whether the original layout, chart structure, and other information should remain.
Give each editing round a clear goal
Specify which image you are using, what to change in this round, and what to preserve. Avoid vague references such as “the one from the previous round” or “same as before.”
Specify grid rows and columns explicitly
For grids, storyboards, or collages, write “2 rows and 3 columns” or “3 × 3 (rows × columns)” rather than an ambiguous “2 × 3.” Describe irregular layouts directly, such as “3 panels on top and 2 below.” Identify a panel to edit by its row and column, for example “row 2, column 1.”
MiniMax H3 Image Use Cases
Give each project a clear visual starting point.
Marketing and advertising
Create visuals for brand campaigns, social media, and promotional content.
Character and illustration design
Explore characters, illustrations, and visual styles for creative projects.
Photography and creative imagery
Turn ideas into photographic images and explore different visual directions.
E-commerce and product presentation
Create product images and presentation visuals for online stores and brand content.
Information and educational visuals
Create illustrations and explanatory visuals for presentations, teaching, and knowledge sharing.
Spatial and environment design
Explore visual concepts for interiors, architecture, and virtual environments.
Creator Stories with MiniMax H3 Image
 MayaDesigner · Interiors
A room and separate furniture photos become a useful conversation starter. Seeing the pieces together makes the intended mood much easier to discuss.
 LeoArtist · Games
That first-person view brings my map to life. It gives the team a shared sense of what a player sees when entering the space.
 NinaArt director · Concepts
Texture, light, atmosphere: I can explore all three from a simple render and carry a clear visual direction into our next review.
MiniMax H3 Image FAQ
Plan your inputs, output, and creative workflow.
When was MiniMax H3 Image released?
MiniMax announced MiniMax H3 Image and released its weights on November 10, 2026. The research blog followed on November 11, 2026. It combines image generation and editing in one checkpoint.
How many reference images can I provide?
For image editing, add 1–16 reference images. Upload JPG, PNG, WebP, or BMP files, or use a publicly accessible image URL; HEIC is supported through image URLs. Each reference must be no larger than 20 MB and 64 megapixels. Describe the role of each image and the changes you want.
What resolutions and shapes does the model support?
Choose 1K, 2K, or 4K; the default is 2K with an automatic aspect ratio. For an exact size, enter both width and height instead. Each dimension must be an integer from 1 to 8192 pixels, the total must be 655,360–20,000,000 pixels, and the width-to-height ratio must stay between 1:3 and 3:1. Download as PNG or JPEG.
Can I use masks or transparent backgrounds?
This generator does not offer masked editing or transparent output. For edits, add reference images and describe what to change or preserve. Transparent areas in reference images are filled with white.
How well does it render text?
Headlines, labels, and short annotations are good starting points. Long paragraphs and dense small print are less reliable. Specify the exact wording and hierarchy, then proofread the result.
How do credits work on Seevio AI?
On Seevio AI, each 1K or 2K image costs 1 credit, and each 4K image costs 3 credits. Text to Image and Image to Image use the same rates, with no extra reference-image charge. Custom sizes are billed by total pixels: up to 1.2 MP uses the 1K rate, over 1.2 MP through 4.5 MP uses the 2K rate, and over 4.5 MP uses the 4K rate. Review the displayed total before generating.
Explore More AI Models
Explore your next idea with MiniMax H3 Image
Bring your references and a clear brief. Discover the visual possibilities of MiniMax H3 Image, then shape your next image in the workspace.
Start creating